Thursday, November 20, 2014

roasted butternut squash+brussel sprouts with pancetta, sage & maple balsamic dressing


This dish is one of those dishes that just SCREAMS fall. I walked into Conolios in search for inspiration, and came across a Vermont Maple Balsamic Vinegar and a Butternut Squash seed oil, and knew I wanted to use roasted butternut squash. I paired it with roasted brussel sprouts, salty+crunchy pancetta, and aromatic sage. This would be a great veggie dish for thanksgiving, paired with a simple chicken breast for a meal, or just as a healthy snack. 

You could easily sub any other nut/seed oil (like pumpkin seed!), and add a tablespoon of maple syrup to a regular high quality balsamic while reducing it. You will have leftover dressing. Save it for a salad, or just eat it by the spoonful (guilty). I recommend drizzling it over before you serve it, your turkey day guests will be impressed!


And yes, I use balsamic in every way I can. One of my best ladies dubbed me "balsamic drizzling queen". 


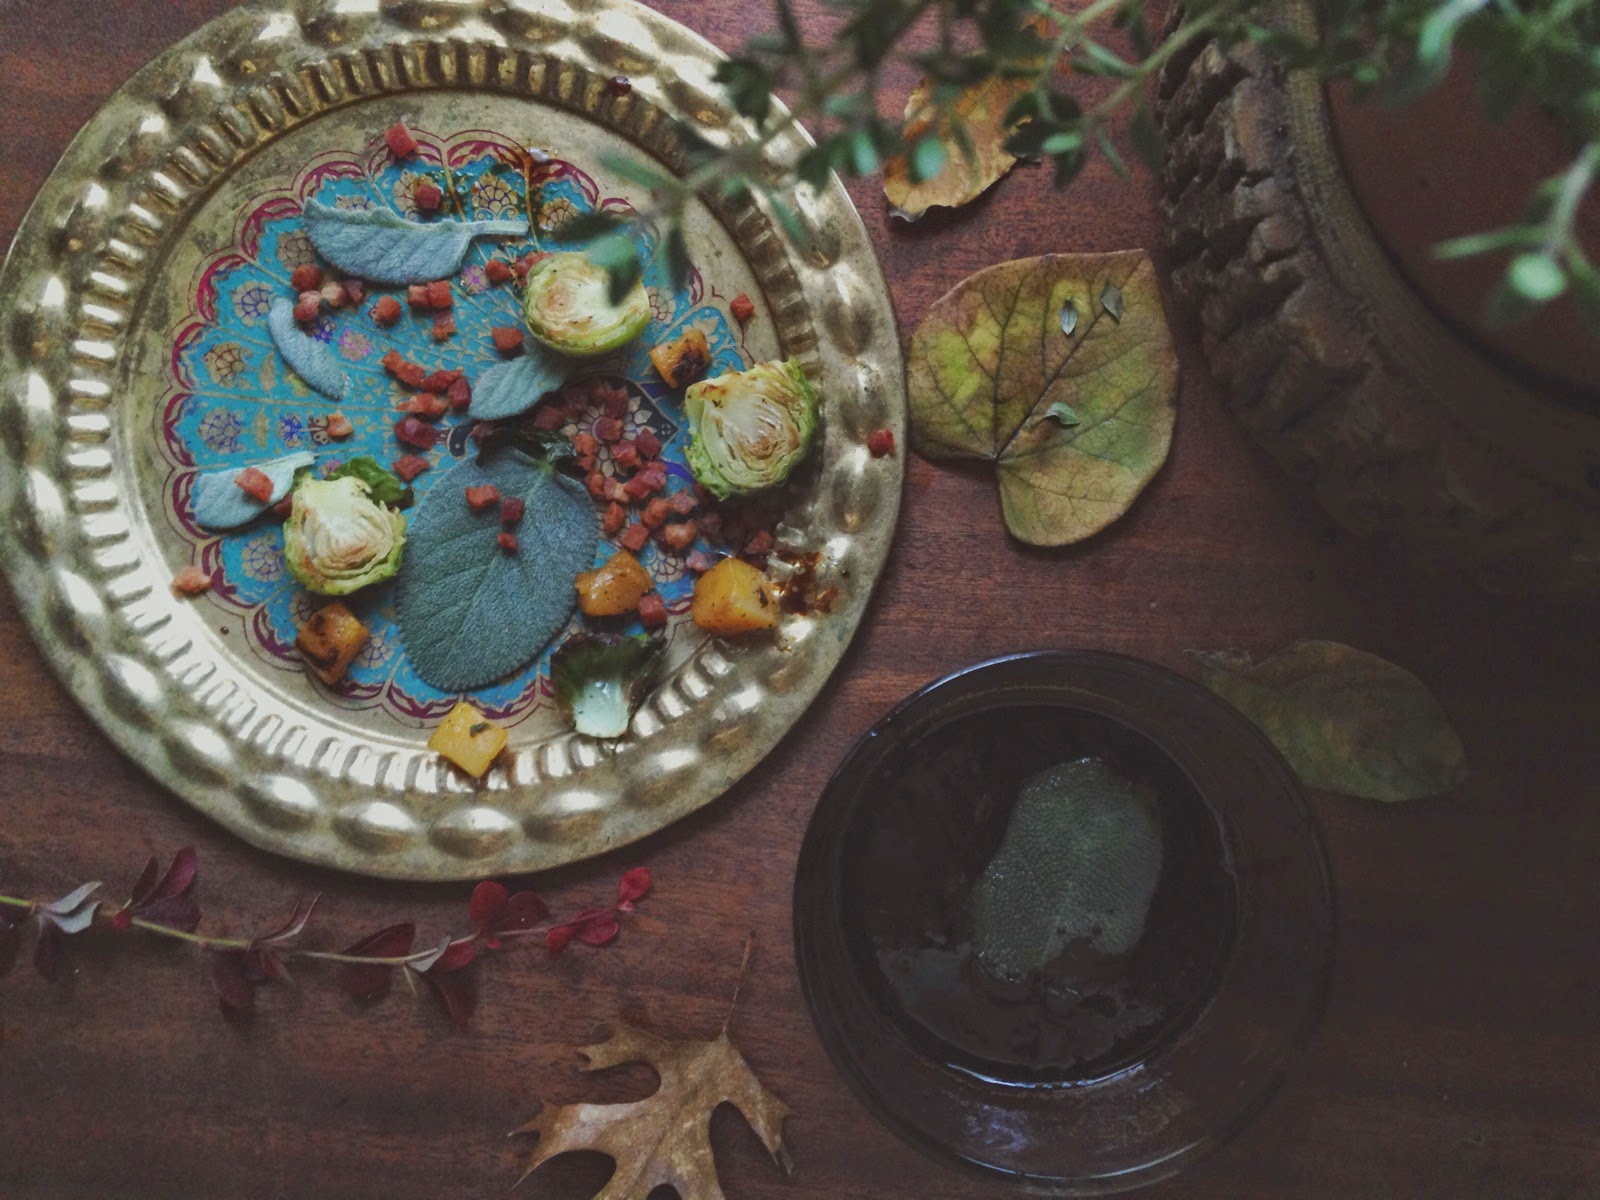
 roasted butternut squash + brussels with pancetta, sage, & maple balsamic dressing
ingredients:
3cups diced butternut squash (I got a big bag of precut at Trader Joe's)
2-3 cups brussel sprouts cut in half (or thirds for larger sprouts), excess leaves set aside
4oz finely diced pancetta (I found mine pre-diced at Trader Joe's)
1/3 cup maple balsamic vinegar
2 tablespoons butternut squash seed oil
2 large sage leaves, torn in small bits
salt&peppa
neutral cooking oil for shallow frying (canola, vegetable, etc)

directions:
Preheat oven to 375°f. While oven preheats, cook your pancetta on medium heat until browned and crispy. Place on a paper towel lined plate to soak up excess oil.  Prepare two baking sheets or roasting pans with foil. Place squash on one, brussels on the other, spreading out so there's just a single layer (vs. piled on top of each other). Season both with salt and pepper, and roast for 20-30 minutes. Until brussels are lightly caramelized and butternut squash is tender and cooked. While veggies cook, cook your brussel sprout leaves. Heat a frying pan over medium-high heat with a couple tablespoons of neutral cooking oil. Cook until brown and crispy in two or three batches as needed, place crispy leaves on a paper towel lined plate to soak excess oil. Next, make your dressing. In a small bowl, add your squash oil. Heat a small saucepan with the balsamic over medium heat, until reduced by about half, and it coats the back of a spoon (this happens quick! Don't let it go too long or it'll turn into balsamic caramel!). Pour hot vinegar reduction over oil, and stir to combine. add a pinch of salt and pepper. Time to plate! Mix sprouts and squash on your serving platter. Mix in crispy brussel leaves, sprinkle over pancetta&sage, and drizzle over as much dressing as your heart desires. 


Tuesday, October 21, 2014

pumpkin cheesecake //gingersnap crust//pumpkin caramel


I've been totally slackin' on the blog posting. I've been making a lot of recipes but a lot of them needed tweaking.... This beauty of a recipe was one of them, and boyyyy oh boy its so worth the work I put into tweaking/perfecting it.

This time of year brings out the baker in me, and fall flavors constantly whiz through my mind. Every year, my signature dish I bring to thanksgiving is a Bon Appetit Pumpkin Cheesecake with gingersnap crust and a sour cream marshmallow topping. This year, I wanted to do a snack size version that wouldn't be such a gut buster. 

Mission Accomplished! The bulk of the "cheesecake" is actually blended fat free cottage cheese.... and don't you dare be scared off by that! I HATE cottage cheese. The texture makes me wanna yak without even having to eat it. I recently started experimenting with blended cottage cheese, and it has transformed the ingredient for me. It lends an amazing smooth and rich element, without feeling heavy like cream cheese can. 

I recommend sweetening the cheesecake to taste, depending on which kind of sweetener/sugar you use. Just sweeten it to your liking before you add your eggs! I sweetened mainly with stevia, plus a small amount of coconut sugar and a bit of brown sugar. This recipe absolutely doesn't need the pumpkin caramel, but I couldn't pass up the pumpkin caramel I found it at Trader Joe's last week. If you do want to do a caramel on top, use any caramel sauce you like!


Pumpkin Cheesecake Bars with Gingersnap Crust and Trader Joe's Pumpkin Caramel

*crust:
2 cups of gingersnap cookie crumbs (or cookie of your choice)
4 tablespoons coconut oil (or other neutral oil or butter)

*cheesecake:
8oz reduced fat cream cheese (I used Trader Joe's light organic whipped)
1 16oz container of cottage cheese ( I used Trader Joe's organic fat free)
1 cup organic canned pumpkin
1/4 cup organic coconut sugar 
2 tablespoons organic brown sugar
17 packets Pure Via stevia (equivilant to a little less than 3/4 cup sugar)
*if using just regular white and brown sugar, 1/2 cup each
1 tablespoon vanilla bean paste (or extract)
1 teaspoon cinnamon
1 tablespoon organic unbleached white flour
2 eggs 
2 tablespoons egg whites (or another egg)

*directions:
Line an 11x7 baking dish with foil, leaving a few inches hanging over so you can easily pull out cheesecake after baking. Grease the foil evenly with oil.

crust: Preheat oven to 350f. In a food processor, combine cookie crumbs and oil until evenly combined. Press mixture into greased pan, patting it until even. Bake for 12 minutes.

cheesecake: Reduce heat to 325f. In a food processor, blend cottage cheese until smooth, scraping sides until blended. Add cream cheese, pumpkin, vanilla, cinnamon, flour, and sugars. Sweeten to taste, then add eggs. Blend until even. Pour over crust*, bake for 45 minutes. Let cool completely, carefully lift the cheesecake out using the excess foil as a handle. Place in fridge for 30 minutes, cut into squares. Top with caramel sauce and coarse sea salt to taste. 
*I had some extra filling left over, so I put a gingersnap cookie at the bottom of a silicone muffin liner in a muffin pan, and poured leftover cheesecake filling on top (made 3 mini cheesecakes) and baked for 25 minutes. 


Tuesday, October 7, 2014

cardamom vanilla bean almond coconut butter


I've always wanted to make my own nut butters. My pantry is well stocked variety of flavored nut butters…. and for the most part I only buy the reasonably priced nut butters in the $3-$5 range. I have made exceptions in the past for intriguing flavors like Wild Friends vanilla espresso almond butter (so good!)...but as we are strapping down and putting a budget into place, spending $10-12 on a jar of almond butter is just silly. I have been eyeballing a Cardamom spiced Almond Butter at Natural Grocers lately, but this one is more like $14 for a very small jar, and I'm tired of being tempted by something that I can actually make at home, for way less, and probably make it taste better. 

I have attempted making peanut butter once before. I don't remember what I did, but it was definitely a big giant fail. While I was making this butta I thought it was a big fail again, and I wondered for a second if I had over processed my butta, so I went a googlin' and did some searching on ways you can screw up making nut butter. One way you can screw it up is adding liquid, like water or milk. I am prettttty sure that is where I went wrong on my failed peanut butter attempt…. 

Luckily, this was not the case with my almond butter. I had added some vanilla bean paste which made me wonder if there was a stabilizer in the paste that could have disrupted the nut butter process…. but that was not the case! Now this whole process took me almost a FREAKING HOUR. But I'm pretty sure it was my stupid (yeah I said it) Ninja blender. I can honestly say that buying a Ninja blender was one of the worst purchases I have ever made. For $100 it sure takes a LOT longer to do simple things-like blend greens into a smoothie- than my $25 Hamilton Beach blender used to. The design of the blades and the blender jug is really really really stupid. Okay, you get it, I hate my blender. My point is, according to every other blogger/recipe I have found, this process should only take like 10-20 minutes in a blender or food processor.  ***UPDATE: turns out, my Ninja doesn't suck as bad as I thought, I suck. The reason it took so long was because I added all of the other ingredients in with the nuts. The trick is to make the nut butter first! Then, add all the yummies. I made a hazelnut butter that took like 5 minutes. Lesson learned *slaps forehead.

Even though this took me an hour, it was so worth it. This butter reminds me of the rich gooey satisfaction of caramel. I drizzled a little bit over my steel cut oats this morning, it was fantastic. You could put this on pancakes, waffles, PB&J, brownies, ice cream, toast…. 

For anyone who isn't familiar with Cardamom, it's a beautiful earthy, warm, sweet floral spice that is commonly used in Indian sweets and drinks (like Chai!). I absolutely LOVE it, and it goes beautifully in this almond butta. I used coconut butter in this recipe, it gives a rich creamy depth to the butter that you don't want to miss! I think even if you don't like coconut, you will love this. There is no coconut texture, just a subtle coconut flavor. If you've never used, seen or heard of coconut butter, it's just like nut butters-but done with coconut. You absolutely can make your own coconut butter by processing shredded coconut, but I like to buy jarred coconut butter when it goes on sale (Natural Grocers has the best hotline specials!). I added coconut oil as well to help out my (stupid) blender, but you may find you don't need to. The trick to making your own nut butter is patience. Process, scrape the sides, process, scrape the sides, etc. It feels like a much longer process if you hover and watch the actual process. It goes through many stages and I thought it would never get out of this half-way-between-nut-and-butter stage (see photo below)! But it did! 


I am so pumped to try making different variations of my own nut butters! I did an approximate cost break down and this only cost me around $4 to make! Aw yeeee. Make you some nut butta, girls and boys.


Cardamom Vanilla Bean Almond Coconut Butter

-ingredients:
2 heaping cups raw almonds
1/3 cup coconut butter
1.5-2 teaspoons cardamom (adjust to your taste!)
1 1/2 tablespoons vanilla bean paste or 1 vanilla bean split and seeds scraped out (can also use vanilla extract, I just love the pure vanilla taste you get from the seeds)
1 tablespoon honey (agave would work too!)
1-2 tablespoons coconut palm sugar (any natural sweetener will work!)
stevia to taste (I used 6 packets of Pure Via stevia)
1-2 tablespoons melted coconut oil (optional-if you need to help your blending device out)

-directions:
In a blender or food processor, blend/process almonds until smooth and creamy. Add in coconut oil if your blender/processor needs help blending. Add in remaining ingredients, blend until smooth, and feel free to taste as you go and add more or less sweetener or coconut butter than I did,  to your taste!

Saturday, August 23, 2014

a simple perfect salad.

This week has been a hard week for me. I've been out of work with a neck injury, and I haven't been handling it so hot. Not being able to work leaves me feeling pretty useless, especially when I'm limited to what I can even do around the house. Of course, I probably pushed it a little more than I should have, cleaning and cooking. Leaving plenty of time to float around, pity parties sprinkled here and there. 

One thing that always seems to lift my spirits is a simple, balanced, light salad. One that feels like it could come from a restaurant. Taking the time to make myself something that not only nourishes my body, but my mind, and soul. Not like this salad was very time consuming, or labor intensive.... Actually quite the opposite. It just felt like a fancy schmancy treat. 

I had roasted a couple organic local beets a couple nights before, so this was stupid quick and easy to throw together. If you've never tried beets, or you have some traumatic childhood experience of canned beets, or beets prepared by a grandparent that was perhaps encased in gelatin, or perhaps in combination with something equally as awful.... say.... canned asparagus.... Pleaseeeeee give them another chance. The first time I had beets in a way that made my heart sing, I was at East Side King, here in Austin. If you know anything about Paul Qui, anything he touches is gold. Well his beet fries are no less golden. I remember taking the first bite and going "Holy ish. I like beets." It was a profound moment. I've had a nerdalicious addiction to food porn via foodgawker going on about 5 or 6 years now. I've seen so many beautiful photos of beets... in combination with goat cheese, balsamic vinegar (my crack), done in dessert with mint.... The color was so beautiful, but I just had a false reality in my head of what beets are, and taste like. I grew up mentally allergic to vegetables in general, and have come a LONG way in my adulthood overcoming my fear of vegetables, and beginning a life long love affair with delicious dirt dwellers. 

Okay okay.... the salad. 

First, I'm going to have a mini rant on balsamic vinegar. I've turned into a little bit of an oil and vinegar snob, and it's all thanks to an amazing little shop here in town called Conolios. This place is a wonderland of sorts. You walk in, and 3 out of 4 walls are occupied by the most phenomenal infused olive oils and dark and white balsamic vinegars I've ever seen/tasted. The best part? You can sample each and every one. Talk about epic salad dressing people! 90% of my salad dressings are home made, using their exquisite products. For anyone who is interested, and doesn't live in Austin, they have a website you can order most, if not all, of their oils and vinegars. Check em out ---> http://www.conolios.com/


So for this particular dressing, I used their Cinnamon Pear Dark Balsamic, with their Basil olive oil. Any good quality balsamic and oil will work for this salad. I do not believe in drowning my greens in dressing. The way I dress is a drizzle of vinegar, and a drizzle of oil, + salt and pepper. I toss it, and add more if needed. Soggy greens make my eyes soggy with tears. Don't drown your salad. Use salt and pepper to bring out flavors. 


Here's my vague but excellent and hard to screw up recipe:


Arugula Beet Salad with Candied Nuts & Goat Cheese
Serves 2

4 fat handfuls of arugula, divided (6 if you have tiny hands)
1 roasted beet, chopped (to roast-wrap in foil, drizzle with olive oil, bake at 400 for an hour, or until fork tender)
4-6 tablespoons crumbled goat cheese, divided
4 tablespoons chopped candied nuts, divided (choose your fave from the bulk section, or make your own!)
drizzle o' balsamic vinegar (I used Conolio's Cinnamon Pear)
drizzle o' olive oil (I used Conolio's Basil Olive Oil)
salt&pepper

Divide greens between your salad bowls/plates. Drizzle your nizzle....errr I mean oil and vinegar (less is more!), season with salt and pepper. Toss with salad hands, or get intimate with your food and use your hands! Taste, add more as needed. Top with chopped beets, goat cheese, candied nuts, and DEVOUR! 


Thursday, August 21, 2014

peanut butter flax cereal bars.

I absolutely love protein/snack bars such as Luna Bars, Cliff Bars, etc. What I don't love is that bagillions of ingredients, AND I've come to learn that even though a large portion of their ingredients are organic, they aren't GMO-free. (Whyyyyyy!?!)  Don't get me wrong, I'm not swearing them off for good, but for around a buck a bar, I felt like I could have a more cost-effective equally as delicious snack, and feel good knowing I don't have to read a short story to know what they're made of. 
I don't usually count calories, but out of curiosity I did a little middle school mathematics, and found they came out to around 110 calories per bar,  between 2 and 3 grams of fat, and around 4-5 grams of sugar. Of course, this will vary depending on what kind of chocolate (and how much you use),  nut butter, sweetener, and protein powder (or not) you choose. Don't be afraid to experiment with different ingredients than I used, this recipe is super flexible! The one thing I tried that I wasn't happy with was doing part real PB, and part PB2 (powdered peanut butter that you mix with water) They ended up a little chewy, which I later realized was because of the water I mixed in, which soggified (cool word huh?) the cereal. 


Peanut Butter Dark Chocolate Flax Cereal Bars
15-20 servings (you can cut them as big or small as you'd like)

//ingredients//
3 cups Enjoy Life Crunchy Flax Cereal (can sub an organic brown rice cereal too!)
1/2 cup organic salted peanut butter (watch out for added sugar!) (link to my favorite here)
1/2 cup organic brown rice syrup (or other sticky sweetener, like agave!)
3 tablespoons protein powder (optional, I used Vega protein smoothie in vanilla)
1/2 tsp salt
3oz dark chocolate bar, or 1/2 cup-1 cup of dark chocolate chips, depending on how thick of a chocolate layer you want! (I used Lily's Dark Chocolate, sweetened with stevia!)
Coarse sea salt, for sprinklin'! (optional)

//equipment//
9x13 baking dish (use an 8x8 if doing a half batch!)
parchment paper
silicone spatula (or two)
2 medium kitchen bowls (atleast one should be microwave safe)
1 small microwave safe bowl

//how to//
Line your baking dish with parchment paper, leaving extra hanging over the edge. In a medium bowl, mix together cereal and protein powder. In a microwave safe bowl, or in a saucepan on the stove, mix together PB, rice syrup, and salt. Heat and whisk until completely mixed. Pour PB mixture over cereal, and use a silicone spatula to mix and coat evenly. Quickly transfer mixture into your parchment-lined pan, and using your hands (slightly damp hands to avoid sticky icky) press cereal mix into pan, relieving yourself of any built up stress by pressing and mashing until flat, even, and gorgeous. In another microwave safe bowl, melt chocolate at 20 second intervals, stirring after each, until completely melted. Using a silicone spatula, spoon your melted chocolate heaven over your bars evenly, until completely covered. I like doing a verrrrry thin coating, so the cereal is just covered. Mo' chocoalte, mo' betta, so make your chocolate layer as thick as you wanna! Lastly, if you so prefer, sprinkle over the coarse sea salt sparingly, but evenly.
If you are impatient like me, place your pan in the freezer for quicker chocolate hardening.... Otherwise, the fridge will do! Once the chocolate has solidified, lift your bars out of the pan, holding onto the parchment paper, and onto a cutting board. Cut into 20 pieces, or more or less if you choose!

snack on, friends.